In this post I’m going to share the initial steps that you will need to take in order to be begin contributing to an open source project. I’ve covered this more generally in the past and wanted to provide a more focused post that covered these steps for a new open source contributor. For this post we’ll use the Humanitarian Toolbox allReady project as our example.
Forking a Repository
When beginning to contribute to a project on GitHub, your first step is to fork the repository. This creates a copy of that repository under your own account enabling you to begin working with the code. The rights to public repositories will be such that you can view the code, but not directly commit into the repository or create branches. This allows the project owners to control changes within their codebase. Changes are made via pull requests; which we’ll cover in a future post.
The forking step creates a copy to which you do have permission to commit and branch on and you can consider this your working copy of the project. You can make changes and commits here, safe in the knowledge that you will not affect the main repository.
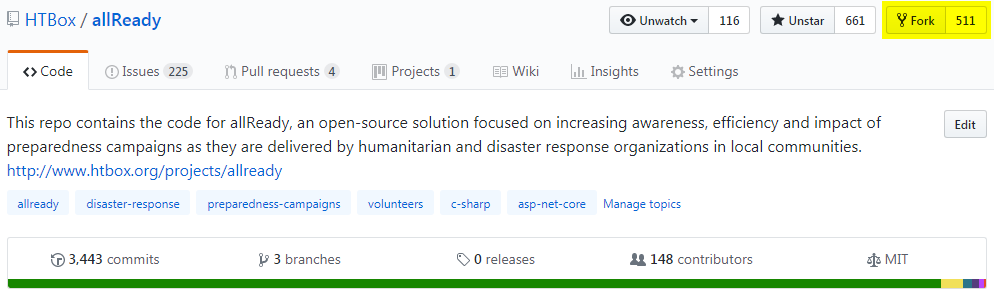
The process of forking on GitHub is very simple. Make sure you are logged into your account on GitHub and then open the project you are interested in contributing to. In this example I’ll navigate to https://github.com/htbox/allready. Once inside the repository you will see a “Fork” button in the upon right hand corner of the UI. Click on this button to begin the automatic forking process.
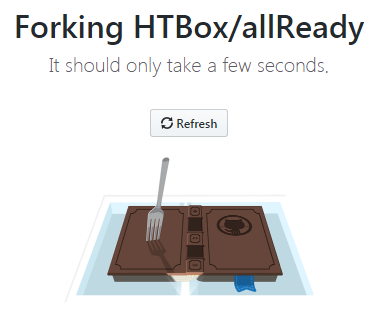
Within a few seconds you’ll have your completed fork.
Cloning your Fork
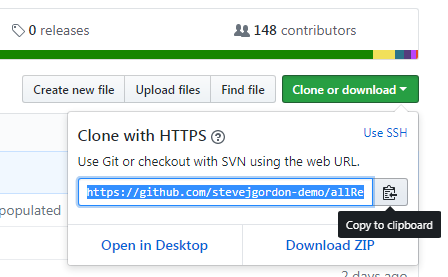
Now that you have your fork, the next step is to clone the code down to your local development machine. Again, GitHub make this quite simple in their UI. To clone a repository you will need its URL. Clicking on the “Clone or download” button will open a UI showing the Git URL. A button to the right hand side of the URL allows you to copy it into your clipboard.
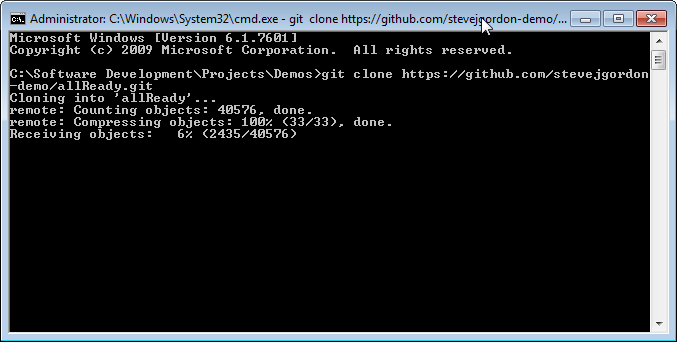
To perform the clone operation I’m going to demonstrate using the command line. There are various graphical tools you can use to work with Git repositories but for simple procedures, the command line is often fastest.
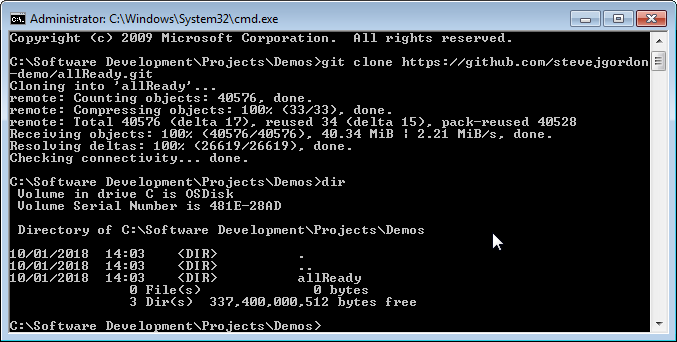
Open a command window and navigate to the path where you would like to clone the repository.
Use the following command to begin a clone:
git clone https://github.com/stevejgordon-demo/allReady.git
Here we’ve pasted in the URL of the fork that we just copied as the argument to the “git clone” command. You will see the output of the clone command as it clones the contents of your repository onto your local device.
Once the command completes you will have a new folder containing the cloned repository. We can validate this by running the “dir” command.
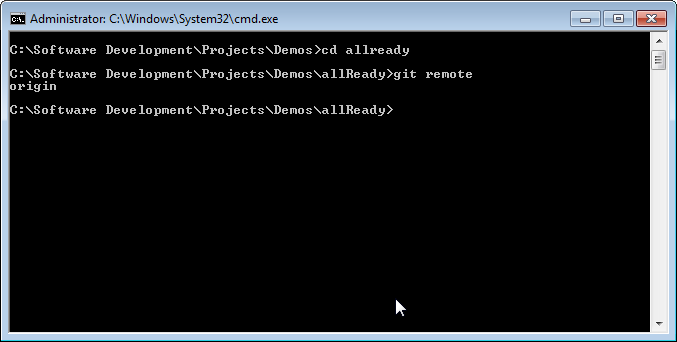
Next we’ll need to navigate into the newly cloned folder. Will do that with the following command:
cd allReady
Registering an Upstream Remote
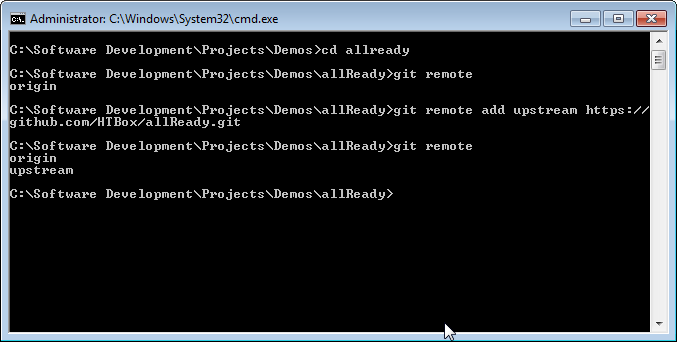
The final step is to setup a remote which points to the main repository. Remotes simply represent paths or URLs to other versions of your repository. In our case, as we cloned from our fork on GitHub a default remote will have been setup for us called origin. This origin allows us to push and pull code from our forked repository hosted on GitHub. We can list the currently configured remotes on our machine using the “git remote” command.
Pushing and pulling from your own fork is very useful and this will be how you will work with the project most often. However, when working on that code, you’ll want to be starting from the most recent version of the code from the main allReady repository. That code may have been updated and changed since you first made your fork. In order to get access to that latest code, we’ll setup a second remote which points to the main allReady repository. We will not have commit rights there, so we cannot push changes, however, we will be able to fetch the latest commits that have occurred.
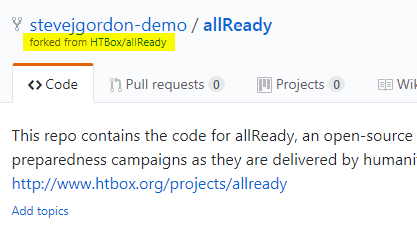
To create a new remote we use the “git remote add” command, passing in a name for the new remote and the URL as arguments. First we need the git clone URL for the remote we want to add. We can get this by heading back to GitHub in our browser. From our fork we can use the convenience link to take us back to the main repository from which we forked it.
Once back in the allReady main project we can use the same steps as we previously used to access the clone URL via the “Clone or download” button and copy it to our clipboard.
Back in our command window; to add our remote for our allReady example we’ll use:
git remote add upstream https://github.com/HTBox/allReady.git
We could name the remote anything we like, but the convention is to use upstream, so we’ll follow that.
If we run the “git remote” command again we can verify that we now have two remotes.
Summary
That’s as far as we’ll take it in this post. We have forked a copy of a repository, in this case allReady, and then cloned the code down to our local machine. We’ve down the work needed to setup an extra remote and we are now in a position to begin working on our first issue. We’ll cover that in a future post.
If you are a visual learner, then I have a video which covers the topics in this post available up on my YouTube Channel
Other posts in this series
Part 1 – This post
Part 2 – Working on Your First GitHub Issue
Have you enjoyed this post and found it useful? If so, please consider supporting me:
Can you add steps to sync local master branch with upstream branch as well or will this be covered in a future post? It is easy to google and find out but will be good to have here in this article for newbies like me 🙂 or link to this page https://help.github.com/articles/syncing-a-fork/
Hi Neel.
Absolutely, I have that planned as a future smaller post and video in the near future.