In this post we’ll look the steps that you can take as a new contributor to open source, in order to find and work on your first contribution to an issue on GitHub. As with the first post (Forking and Cloning from GitHub), we’ll use the Humanitarian Toolbox allReady project as our example.
Choosing An Issue
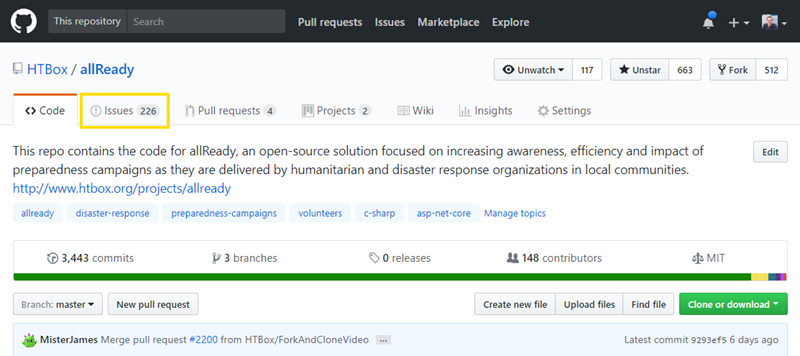
The first step when contributing to a project is to visit the project site and find an issue you would like to work on and which you think is suitable for your skill set. From the project homepage on GitHub you can click the Issues tab to navigate to a list of the open issues.
As a first time contributor you will ideally want to find something small and relatively straightforward to use as a nice entry into the project, before trying to tackle larger more complex issues. Don’t try to dive in too deep on your first few contributions!
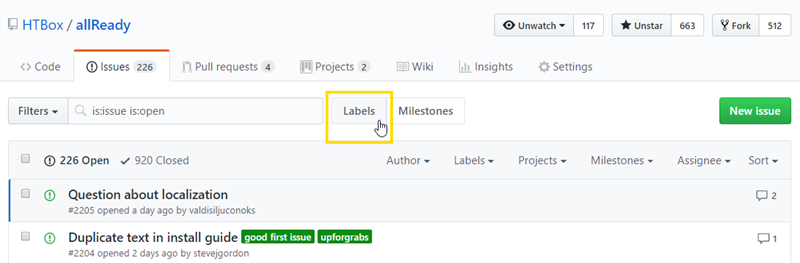
Many projects will label their issues and this is often a good way to filter down the issues list to ones that you might want to work on. On the allReady project we have a “good first issue” label and we also use the “upforgrabs” label convention. “upforgrabs” is a label projects can use to highlight available issues, usually ones which are good for new contributors. There is a master site which scrapes these and provides a way to find issues that you can contribute to across many projects on GitHub.
To view a list of the available labels you can click on the “Labels” button in the UI
From the labels view, you can scroll and find a label to work on.
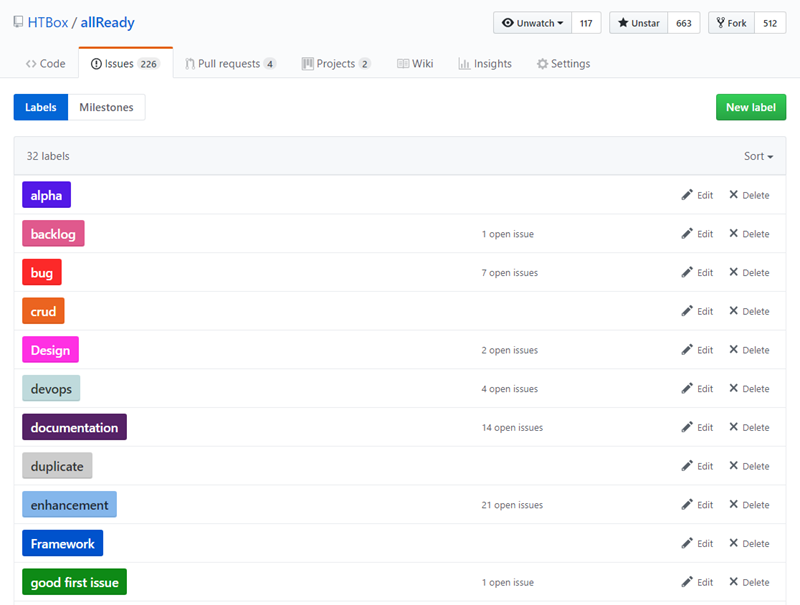
From this list for allReady, “good first issue” sounds like a reasonable candidate for newcomers so we’ll click on that. This will result in a filtered view of issues, showing only those which have this label applied to them.
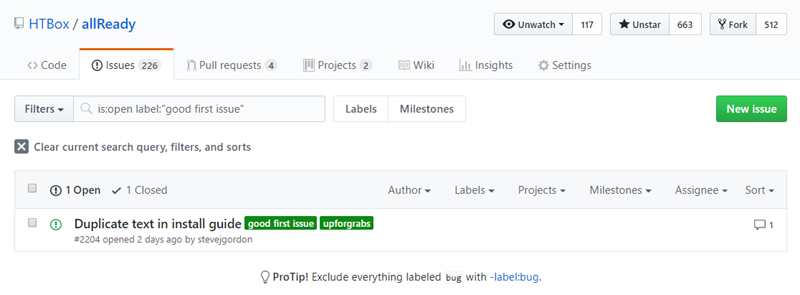
In this example, there is one issue now showing. We can click on that issue to view more detail and to determine if it’s something we’d like to work on.
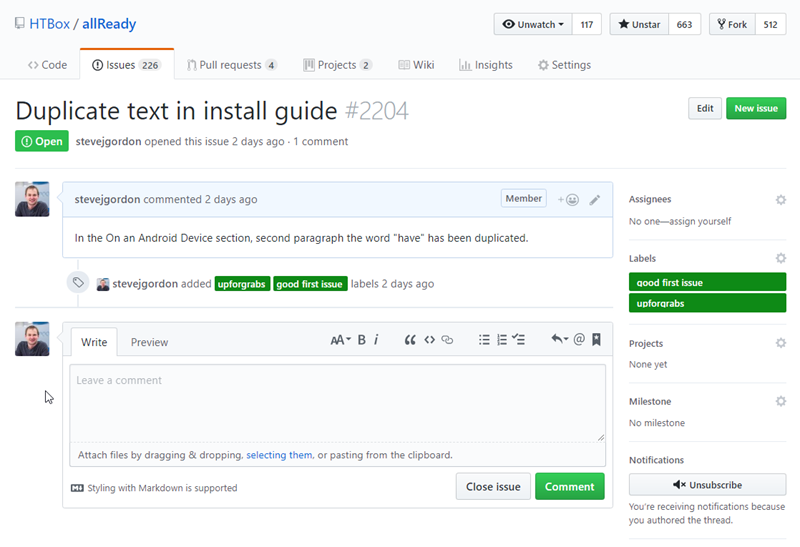
The issue details page provides the full information about the issue. Usually the top comment will include details of the bug or the feature that is needed. Issues can be raised by anyone and as a result, the level of detail may not always be sufficient to understand the problem or requirement. On allReady, the project owners and core contributors try to view new issues and triage them. This involves verifying the issue being reported is valid and where necessary, providing some further details or guidance. If it’s not clear what is needed from an issue, you can leave a comment to ask questions about it. If you have an idea for a solution, but want to run it past the project team before starting, work, you can leave a comment for that too. Issues are a good place for open discussions like this.
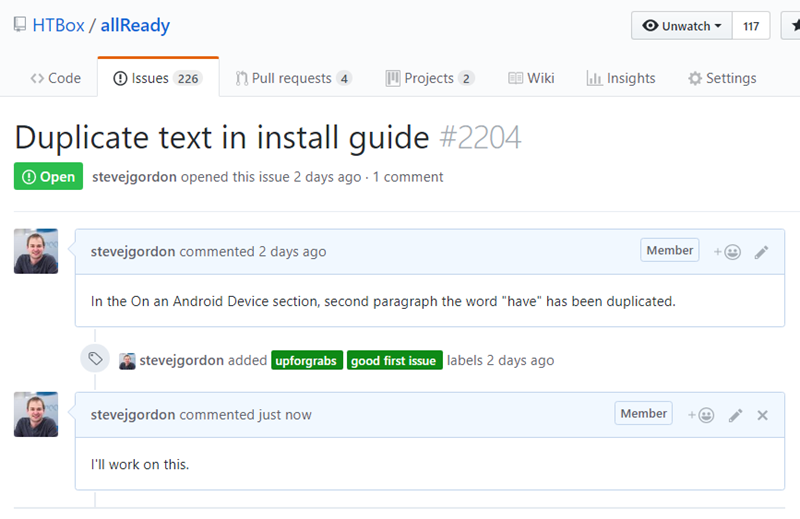
In this example, the requirement is quite clear and the solution should be very simple; we’d like to have a go at working on this issue. It’s good practice and etiquette to leave a comment an any issues you plan to work on so that other people know it’s no longer available. Having two people spending their time on the same issue can be frustrating. It’s also worth pointing out that you should check for any comments indicating that someone else is already working on an issue before you pick it up yourself!
Working on an Issue
When beginning work on an issue locally, the first thing you’ll need to do is to create a branch for that piece of work. There are many Git UI tools that allow you to create a branch, for this demo we’ll use the command line. To create and checkout a branch you can use a single command.
git checkout -b <branchname>
This command allows us to specify a name for our new branch and immediately check it out so we can work on it. The naming convention you use for your branches is up to you. They will live in your clone and fork of the project. Bare in mind, once pushed to your public fork and when you later submit a pull request, they will be public. I tend to use the issue number for my branch names. Personally I find this works quite well since the branch names are short and I can easily lookup the issue details on GitHub to see the requirements. In this case, the issue we’ve selected is issue #2204 so I’ll use that for my new branch name.
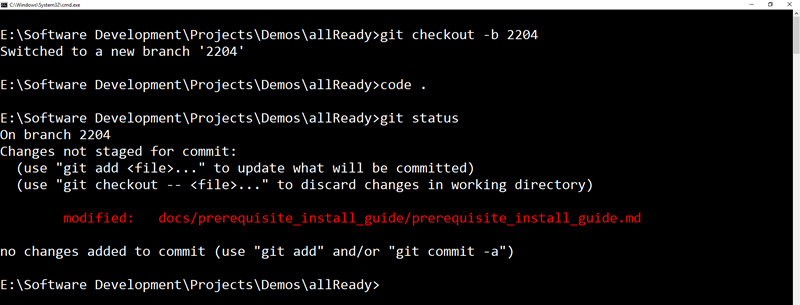
git checkout -b 2204

Once we are on our new branch we can make changes to the code which address the issue. I won’t show that here, but for this issue I opened up the markdown file and made the appropriate fix to remove the duplicated text using VS Code. You can use any tools you like at this stage to work on the code and files.
Once we have made the required changes that address a particular issue, we need to commit that code to our branch. We can use the “git status” command to view the changes since our last commit.
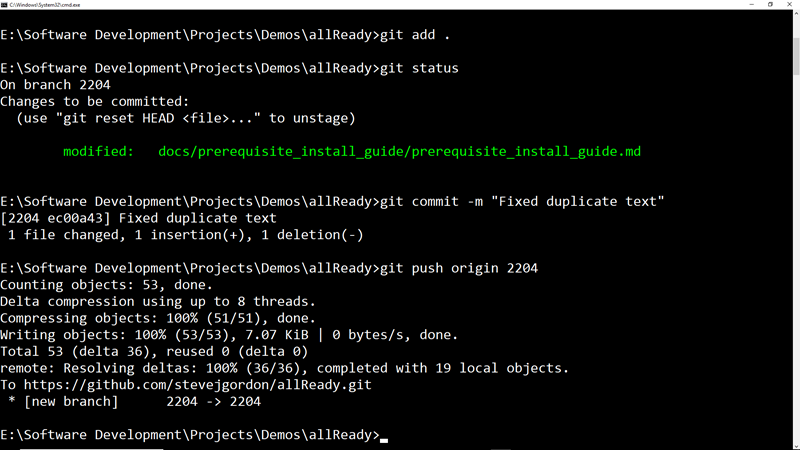
In our example above, only one file has changed. We then use the “git add” command to stage the changes for the next commit. As we have one modified file we can use the following command:
git add .
This stages any new or modified files from our working tree.
Next we will commit our staged changes using the “git commit” command. In this case we can use the following example:
git commit -m "Fixed duplicate text"
The -m option allows us to specify a message for our commit. It’s good practice to try and provide a succinct, but descriptive message for your commits. This helps a reviewer understand at a high level what was addressed in each commit.
At this point we have made and committed out changes local to our development machine. Our final step is to push the changes to our fork of the allReady repository up on GitHub. We can do that using the “git push” command. We need to specify the name of the remote that we want to push to and the name of the branch we want to push up. In our example, the command looks like this:
git push origin 2204
This pushes our local 2204 branch to the origin remote, which is the fork of the allReady project which we created on GitHub.
Summary
At this stage we have selected an issue to work on and begun that work locally on a new branch of the code. Once we had completed our changes we are able to commit those and push them up to our fork of the code on GitHub. In the next post we’ll look at how we create a pull request in order to submit our change to the project for inclusion.
If you are a visual learner, then I have a video which covers the topics in this post available up on my YouTube Channel
Other posts in this series
Part 1 – Forking and Cloning from GitHub
Part 2 – This post
Have you enjoyed this post and found it useful? If so, please consider supporting me:
As a first time contributor, on top of choosing a small issue, I’d also suggest choosing an issue that has been open for awhile or that people seem to be avoiding working on because it’s not very interesting. It’s a good way to endear yourself to the owners of the project.