In this post, I wanted to share the steps required to get started with GitHub Actions to automate your workflows directly inside GitHub. I’ve fairly recently been learning about using GitHub actions while creating and maintaining them as part of my work at Elastic. I very much agree that the best way to embed what one learns and to expand one’s knowledge, one should try to teach it, so here I am!
Many developers today will be familiar with GitHub, where git repositories are hosted both publicly and privately. Many organisations choose GitHub for their private repositories, but of course, there are also millions of public, open-source repositories maintained by the community.
GitHub actions are an easy way to automate common software workflows, such as performing checks and running tests when pull requests (PRs) are submitted. It’s possible to build rich Continuous Integration/Continuous Deployment (CI/CD) workflows for your repositories. The great news is that they are free to use in public repositories, so there really is no reason not to take them for a spin.
Adding a GitHub Action to a .NET Repository
We won’t get too advanced in this post, focusing on the fundamentals of how to add a GitHub action workflow to an existing repository. As an example, I created a new repository on GitHub to which I pushed a very simple .NET class library solution. The solution includes the class library itself, and a xUnit test project. You can find it in its before state at this git tag.
We’d like to add a GitHub action that builds the library and executes its tests on every PR we receive. That way, as well as reviewing the code, we can check the result of the workflow to confirm that the change builds and has not broken any existing functionality.
We can add Actions via the GitHub website, but I’m not going to do that here. We’ll prefer the technique of providing a workflow by directly adding it as a file in our repository.
In the root of our git repository, we need to add a “.github” directory, with a “workflows” subdirectory. This is where GitHub looks for workflow configuration files that are applied and executed. Inside this folder, we can add one or more YAML files, each providing the configuration for a workflow. It’s possible to add many workflows which specify different automation requirements for your GitHub repository. We’ll start by adding a single file named “CI.yml”.

Love ’em or hate ’em, YAML files are commonplace in modern automation, containerisation and cloud configuration domains. The YAML (Yet Another Markup Language) format relies on indentation rather than braces to provide a structure to the contents.
GitHub Action YAML Syntax for Workflows
We’ll get started by producing a workflow configuration.
At the top of our file, we’ll specify the name for our workflow. This is not absolutely required but is a good practice since it will be displayed in the GitHub Actions UI. When you omit this, GitHub infers the name based on the path to the workflow.
name: CI Build
The next section is required and configures the trigger(s) for the action. There are several possible triggers available. We can run workflows on a given schedule or trigger them manually. Most often though, we want to trigger when certain things occur in the repository such as a PR being submitted or even when labels are applied. You can find a complete breakdown of the different webhook triggers in the documentation. The list is very comprehensive and you can get creative with using actions for all manner of tasks.
Triggering GitHub Actions
Triggers are specified in the “on” section of the YAML file. Here’s the configuration we’ll apply for this simple example.
on:
  push:
    branches:
      - main
  pull_request:
    branches:
      - main
This code specifies that we want to trigger this workflow when either of two events occurs. A push to the main branch or a pull request targetting the main branch. The syntax provides rich ways to narrow down here and when workflows should take effect. We’ve chosen to limit the workflow to our main branch. If you prefer, you can provide an exclude list instead using “branches-ignore” which allows the action to apply to all but your specifically excludes branches or tags.
In our example, our configuration means that when someone submits a new PR against our default branch, named main, the workflow will run. Later we’ll see how this can be extremely useful in identifying PRs which may break our code if they are merged. We also run the workflow for pushes to the main branch.
Workflow Jobs
The final section we must provide is “jobs” where we specify one more jobs that will execute as part of the workflow. Each job must include a job ID, an alphanumeric string value, that cannot contain spaces but can contain dash and underscore characters. For legibility when output is displayed in the UI, we can also provide a “name” which may include spaces. For example:
jobs:
  first_job:
    name: First job
  second_job:
    name: Second job
For our actual workflow, we’ll start with a single job which builds our code and executes the tests.
jobs:
  build:

    runs-on: ubuntu-latest

    steps:
    - uses: actions/checkout@v2

    - name: Setup .NET SDK
      uses: actions/setup-dotnet@v1.7.2
      with:
        dotnet-version: 5.0.x

    - name: Restore
      run: dotnet restore

    - name: Build
      run: dotnet build --configuration Release --no-restore

    - name: Test
      run: dotnet test --no-restore
Our job ID is “build” and we don’t provide a name since the ID will be used when we don’t and is suitable for our needs.
We begin by including the “runs-on” key where the value specifies a runner for the action. You may choose to use your own VM for running your actions, but often, for public repositories, it’s easier to use a GitHub hosted runner. We can choose between Windows, Ubuntu Linux or macOS environments. In a future post, we will learn how to run our actions across more than one OS, which can be very useful to identify issues that may be platform dependant.
In this example, we’ll use the latest version of Ubuntu to act as the VM environment where our action will execute.
Job Steps
A job will contain a sequence of steps that will be executed sequentially, each in its own process. The steps are used to configure the runner and perform any number of commands against our repository. We can provide commands to execute, as well as reference pre-defined steps for common tasks. We can run pre-defined actions from within the same repository, a public repository or even from published Docker container images. To specify these, we include them with the “uses” keyword.
Our first step uses the “actions/checkout@v2” provided by GitHub. This references the v2 tag of the public actions/checkout repository. This action will checkout the appropriate commit which triggered the workflow.
For our section step, we have included a friendly name of “Setup .NET SDK” and we are using another GitHub provided action. The “actions/setup-dotnet@v1.7.2” action will configure the .NET SDK on our runner so that we can use the .NET CLI command. For this step, we have provided an input parameter using the “with” element to specify the SDK version we require. We request the installation of the latest patch release of the 5.0 SDK. The action downloads and caches a version of the .NET SDK and adds it to PATH.
Next, we have three more steps, each of which specifies the “run” keyword to provide a command to execute in the OS shell. In our example, each step executes a single-line command by calling the dotnet CLI. You can specify more complex multi-line commands if you need to.
In our case, the third step runs the dotnet restore command to restore any required NuGet packages. Next, we perform a build of the projects within our solution. The final step executes the tests. If the tests succeed, the dotnet test command returns an exit code of 0, otherwise, it returns 1 due to failures. GitHub Actions uses the returned status code to set a success or failure status against the workflow run. The GitHub UI will then highlight failures in the appropriate places.
Deploying a GitHub Action
After completing our YAML file, specifying the job(s) for our workflow, we can deploy it to GitHub. You may wonder how we can test the workflow. The easiest way is to commit the workflow file(s) and submit a PR to our repository. Because our PR includes our workflow YAML file, it will be picked up and executed by GitHub automatically. At the bottom of our PR, we can see any workflows which have been triggered.
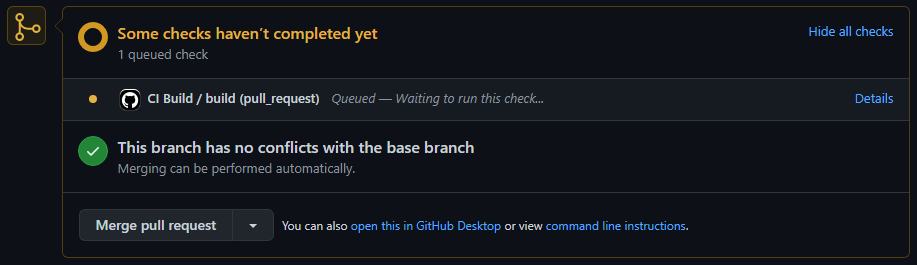
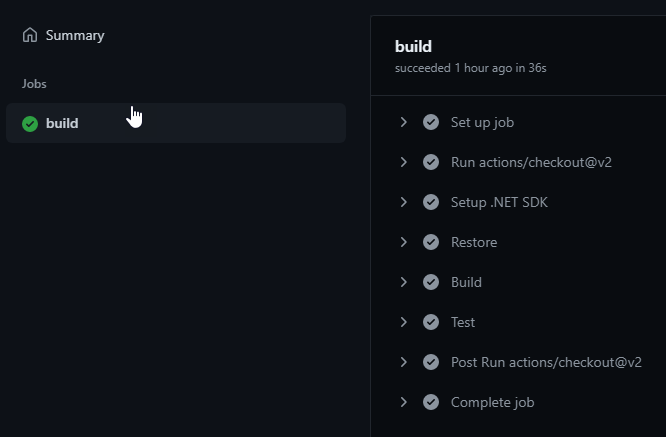
One or more workflows may execute in parallel if they apply to the pull-request trigger. While they are running, we can click on the “Details” link to view the progress and the live output from the runner. After a little time, the steps will have completed and the UI will indicate success or failure based on the return codes of the workflow commands.
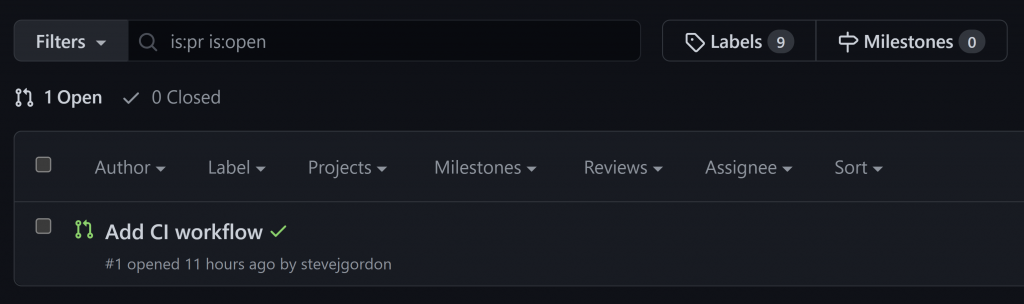
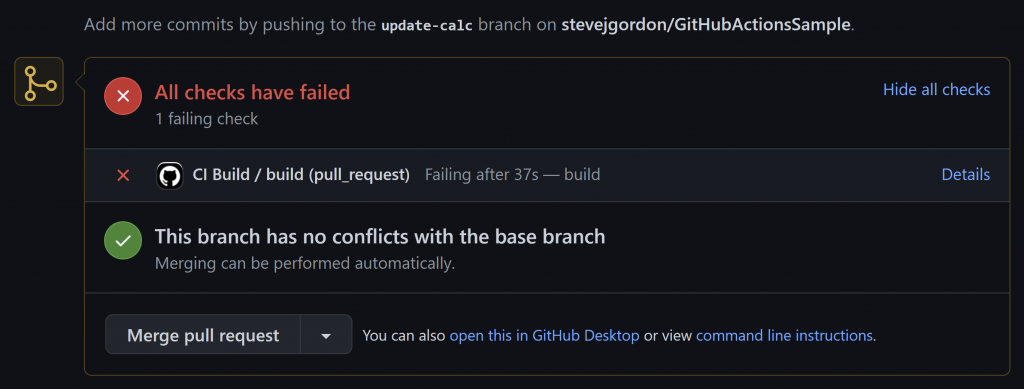
In the list of open PRs, we can see a clear indication of the outcome for any workflows, either a success or failure. This is a useful indicator for maintainers to identify PRs which may break the functionality of the code. This is where GitHub Actions shine as we no longer need to make assumptions about whether the code builds or passes tests, nor do we need to checkout the PR branch locally to run such validations manually.
At the bottom of the PR itself, we can see a breakdown of any jobs and an indicator to show if they succeeded or failed.
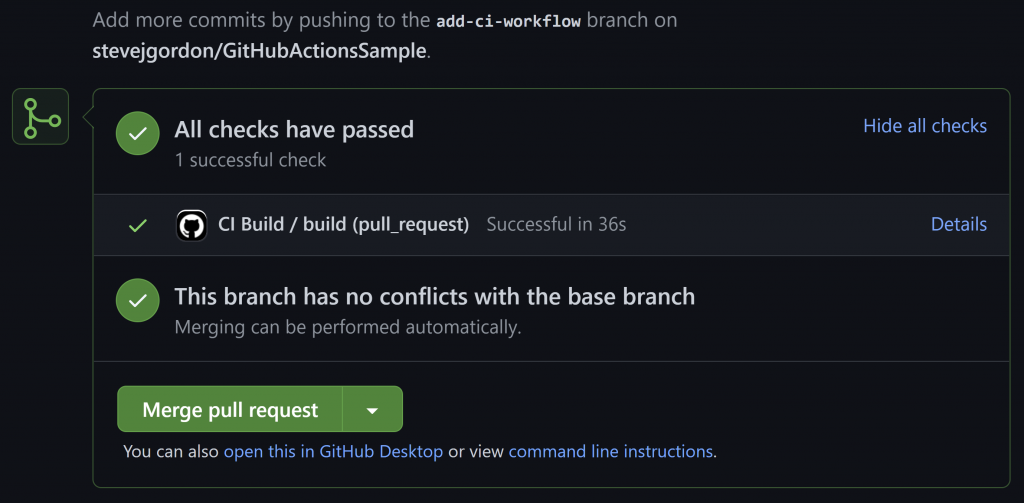
We can click on the “Details” link to expand the view and jump into any of the steps for the workflow, including the shell output. This can be particularly useful when the workflow fails and you need to track down what failed.
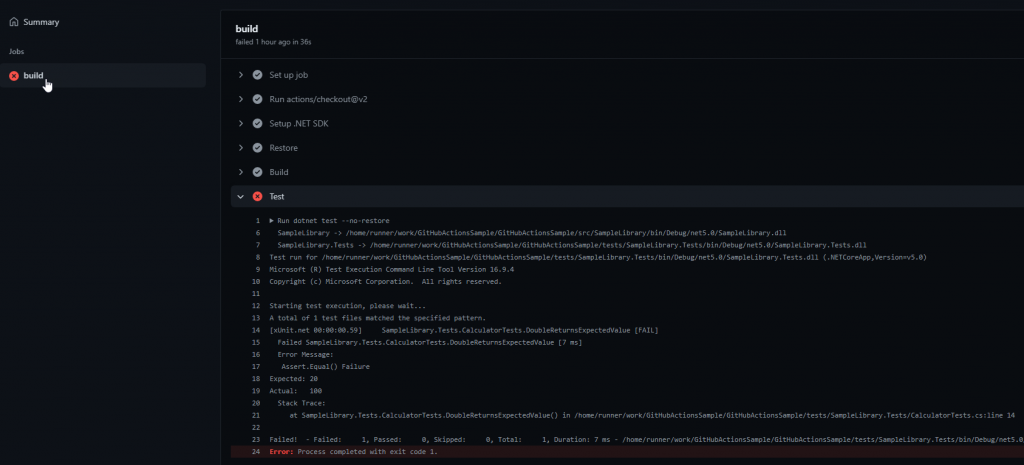
As an example of a failure, I’ll create a new PR that includes a code change that breaks the functionality of the sample library. Since we have a unit test project, we hopefully have tests that detect the failure. Indeed, after submitting a PR, after the workflow runs, the checks pane shows that we had a failure in our CI Build.
After clicking on the details, we can expand the test step which includes the command line output from the dotnet test command. We’ve broken the DoubleReturnsExpectedValue test and this failure causes the overall action to fail.
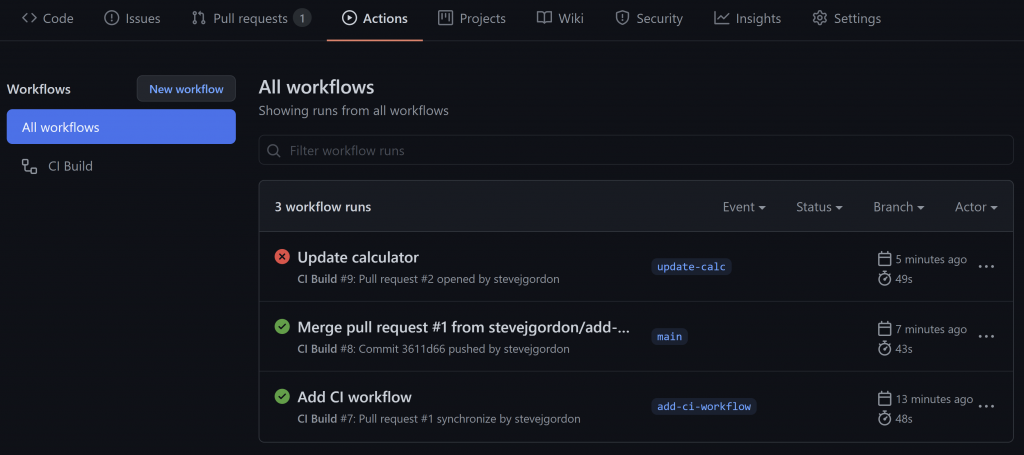
After configuring workflows, at any point in time, we can visit the Actions tab for the repository to view the result of workflow runs.
Summary
In this post, we’ve learned the basics of applying GitHub actions for a .NET repository. Our workflow is triggered for pull requests and pushes. It builds the code and executes our tests so that we can quickly validate whether pull requests to our repository are in a good state to be merged.
GitHub actions are a powerful and free (if you have public repositories) way to automate common tasks for your repositories. We’ve used them here for a basic CI flow but the possibilities are endless. The Elasticsearch.Net repository, for example, includes scheduled workflows which trigger code generation tasks. We check for stale documentation on pull requests as well as running integration tests across several versions of Elasticsearch. Results of the workflows push messages to our Slack channel to notify us of any possible issues.
I plan to expand on this series in the future by describing some of these more advanced use cases. If you haven’t already, consider at least adding a basic build workflow as we’ve shown in this post to your public repositories.
Have you enjoyed this post and found it useful? If so, please consider supporting me: