In this post, I’ll introduce Amazon ECR and explain how to use it as a registry of Docker images, ready to run your .NET applications in the cloud. In future posts, we’ll learn more about the options for running your .NET applications containers on AWS.
This post serves as an update and continuation of an older “Docker for .NET Developers” series which I published a few years ago. Much of that content is still broadly relevant and a good starting point if you are new to Docker.
When deploying your applications to run as containers, one of the early steps you need to complete is to build an image. You define and build an image using a Dockerfile, and from that image, you can launch container instances of it. When you are developing locally, those images can be run using Docker on your development machine.
At some point, you will want to run those containers in production, or at the very least not just on your development machine. At this point, you need to use a container registry, which is a place to store and share images. Just as we may use a public or private NuGet server to store and distribute software libraries, we can use a registry service to store our images.
There are, of course, many ways to achieve this both on-premise and in the cloud. I’ve been building .NET microservices for the last few years. My employer is an Amazon AWS customer, and as a result, we run our containers using AWS services. In our case, we use a service called ECS, Elastic Container Service, run our .NET microservices using Docker. At the time we began our container journey, this was the original and only managed container orchestrator. Today another strong contender on AWS is Amazon EKS, Elastic Kubernetes Service.
Regardless of your container platform, you will need a place to store your images so that they may be used to run containers in the cloud. For public images, those you wish to distribute to others, Docker Hub is a common choice. If you are developing services for your organisation, it’s more likely that you’ll want to keep your images private and secure. We use Amazon ECR, Elastic Container Registry , as our container registry.
What is Amazon ECR?
Amazon ECR is a fully managed container registry service for storing Docker and OCI container images. It natively integrates with other AWS services which you will use to run container workloads. In addition, it integrates with other AWS services to meet the stringent security demands around storing images, such as ensuring they are accessible only by authorised parties. Because it is a fully managed service, there’s little you need to do to begin working with it. Pushing images to Amazon ECR will be a common starting point when you first begin running .NET containers on AWS.
Creating and Storing Images for .NET Services using Amazon ECR
For the remainder of this post, we’ll get practical and step through the initial workflow to create a registry, build an image and conclude by pushing that image to the registry.
Creating an Amazon Elastic Container Registry
Amazon AWS offers a plethora of ways to interact with their services. I’m going to cover a few of these in this post, but the list is not exhaustive. We’ll begin by manually creating a registry within the Amazon Management Console. You’ll need to create and configure an AWS account to follow along.
From the management console, you can search for the ECR service using the find services dialog.
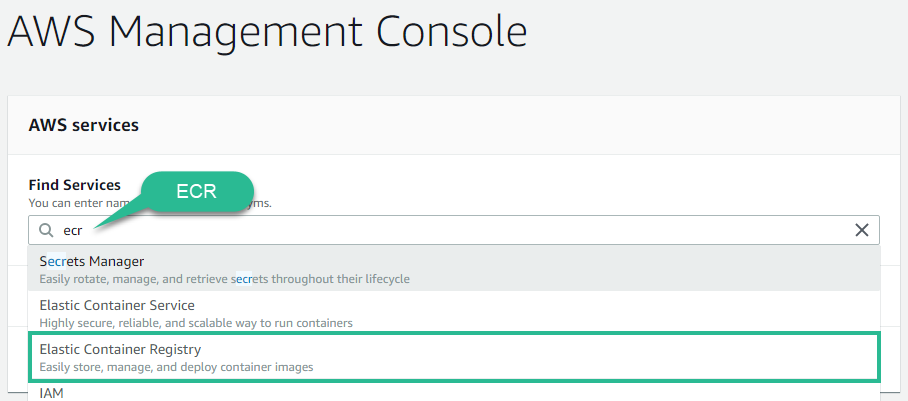
After selecting the Elastic Container Registry service, you will be taken you to the ECR section of the Amazon Container Services console.
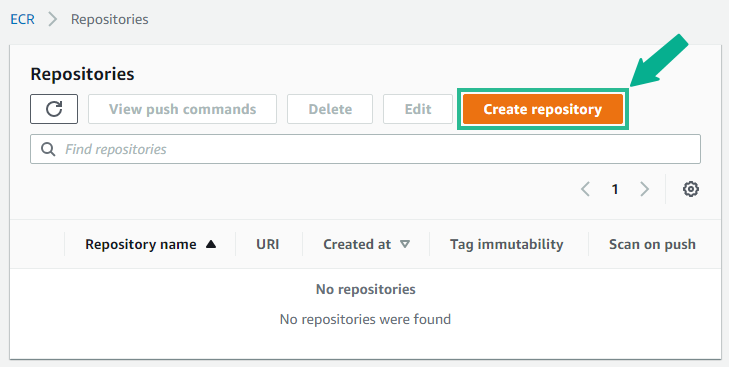
We can create a repository directly from the console.
Each repository needs a name which must be unique within your account and region. We’ll use a basic name for this example. Still, you may choose to namespace your repositories to logically group them, perhaps by team or project. We’ll create a namespaced repository in a little while.
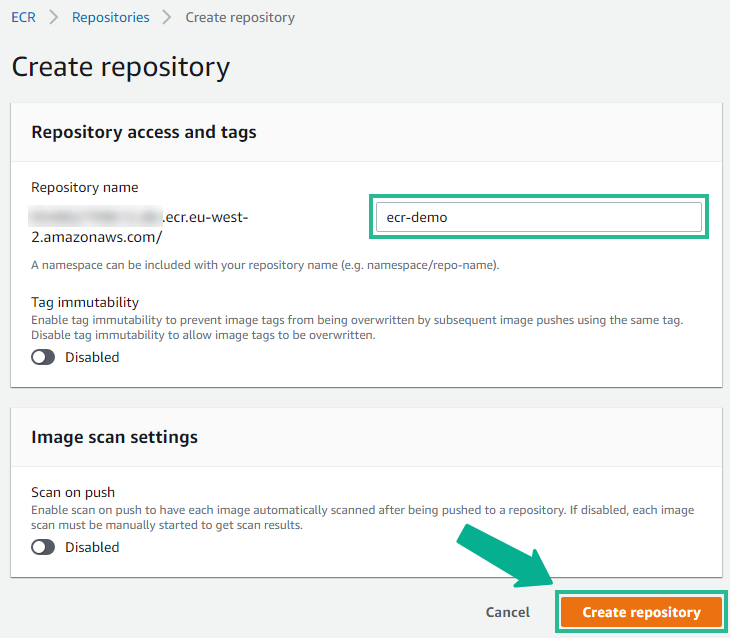
For now, we don’t need to worry about the other options that the UI presents and can proceed to create our repository.
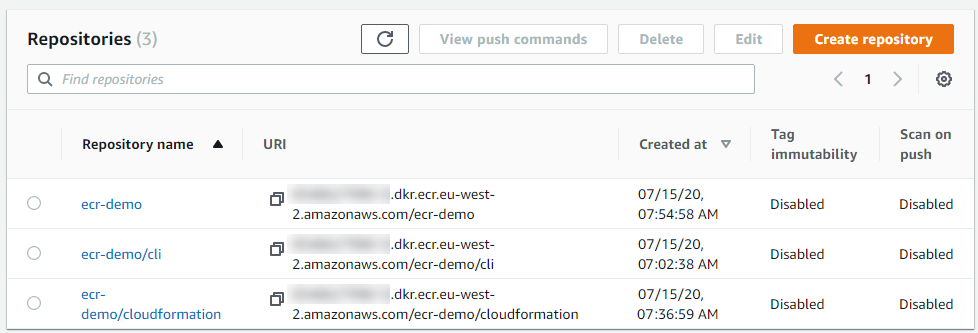
Once the repository is created, it will be listed in the table of repositories shown in the console.

Creating an Amazon ECR repository using the AWS CLI
The console provides a simple UI to manage ECR and to create a repository. As you get started with new services, this is often the quickest way to learn and explore. As you become more proficient with a service and use it more regularly, you’ll find that programmatic management is more repeatable and more straightforward to maintain.
AWS services are exposed through APIs which you can call directly. While possible, you’ll need to concern yourself with authentication, creating requests and handling responses. A better choice is to use the higher-level tools such as the AWS CLI (Command Line Interface), the SDKs (Software Development Kits), infrastructure as code with Amazon CloudFormation or the more recent AWS CDK (Cloud Development Kit).
I won’t touch on all of these in this post, but as a quick example, we could use the AWS CLI to create a new repository. You’ll need to have valid AWS credentials configured so that the CLI can authenticate requests to AWS. While focused on how the SDK loads credentials, my post “Credential Loading and the AWS SDK for .NET (Deep Dive)” may be a useful read.
Creating a repository using the CLI is a one-line affair:
aws ecr create-repository --repository-name ecr-demo/cli
In the snippet above, we’ve used the create-repository command and provided a repository name. Here I’ve shown the use of a namespaced repository name by including a forward-slash character. The text before the slash is the logical namespace (“ecr-demo” in this example) and the text after that is the repository name within that namespace (“cli” in this case).
The repository will be created in the region as has been configured in your profile and/or environment variables. You may choose to provide a different region in your command if you require it.
Once the command executes, it will return a JSON response, containing details about your new repository, assuming it completed successfully.
{
    "repository": {
        "repositoryArn": "arn:aws:ecr:eu-west-2:123456789012:repository/ecr-demo/cli",
        "registryId": "999999999999",
        "repositoryName": "ecr-demo/cli",
        "repositoryUri": "123456789012.dkr.ecr.eu-west-2.amazonaws.com/ecr-demo/cli",
        "createdAt": "2020-07-15T07:02:38+01:00",
        "imageTagMutability": "MUTABLE",
        "imageScanningConfiguration": {
            "scanOnPush": false
        }
    }
}
Creating an Amazon ECR repository using AWS CloudFormation
A powerful way to manage your services at scale is to look at solutions such as infrastructure as code. AWS provides a service to allow you to define a description of resources you wish to create in AWS using a JSON or YAML format. These templates can then be run into a stack in CloudFormation and maintained over time, with AWS deploying the changes to your services.
I won’t go into the use of CloudFormation in this post. Still, if you are already familiar with it, then a simple template can be used to create a repository using CloudFormation.
{
    "AWSTemplateFormatVersion": "2010-09-09",
    "Description": "Creates an ECR Repository",
    "Resources": {
        "ECRRepository": {
            "Type": "AWS::ECR::Repository",
            "Properties": {
                "RepositoryName": "ecr-demo/cloudformation"
            }
        }
    }
}
The above template uses the JSON format and specifies that we would like to maintain a repository named “ecr-demo/cloudformation”. Because ECR is a pretty simple service, there are very few properties we need to provide. You can read the ECR CloudFormation documentation for more information.
After creating a stack using CloudFormation, your repository will be created for you and can be managed over time by redeploying the stack with any updates you require.
After creating repositories using these three options, I now have three repositories created and listed in the repository table. We’ll use “ecr-demo” for the remainder of this blog post.
Creating a Docker Image of a .NET Application to Deploy on AWS
I’m focusing this post around ECR, but to demonstrate the use of the service, we’ll need an image to push to the repository. We’ll follow some simple steps to produce a hello world .NET application and to build a Docker image.
Creating a Worker Service Project
For this post, and some future ones, we’ll get started with running a .NET Worker Service in AWS. Worker services can be used to run long-running workloads such as processing messages from a queue. If you’d like to learn more, I provided an overview in my “What are .NET Worker Services?” post back in March.
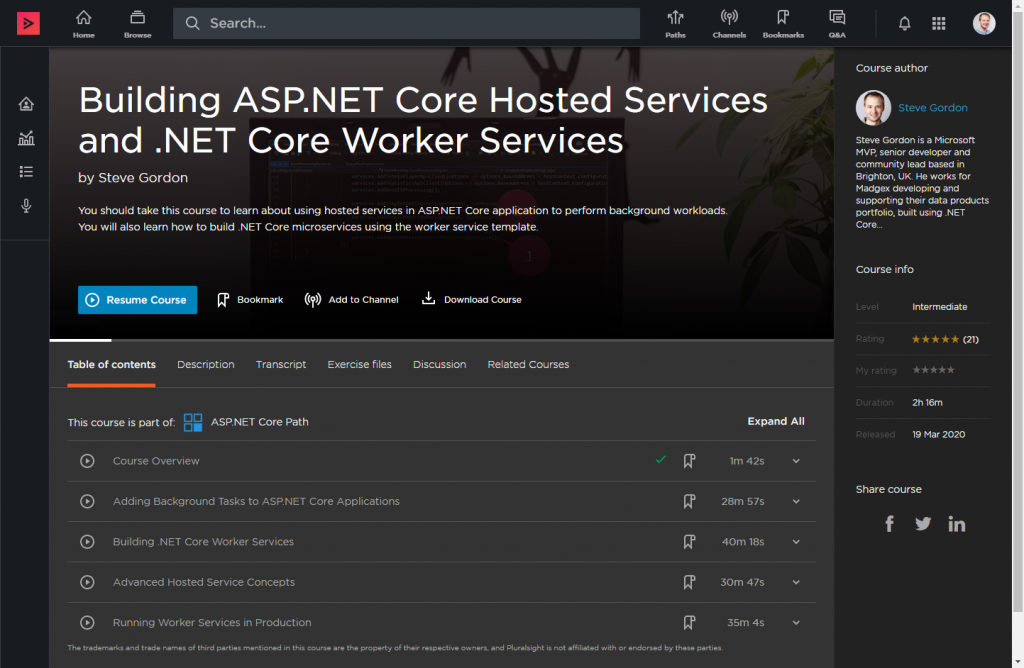
I also have a Pluralsight course which covers them in much more depth – “Building ASP.NET Core Hosted Services and .NET Core Worker Services “.
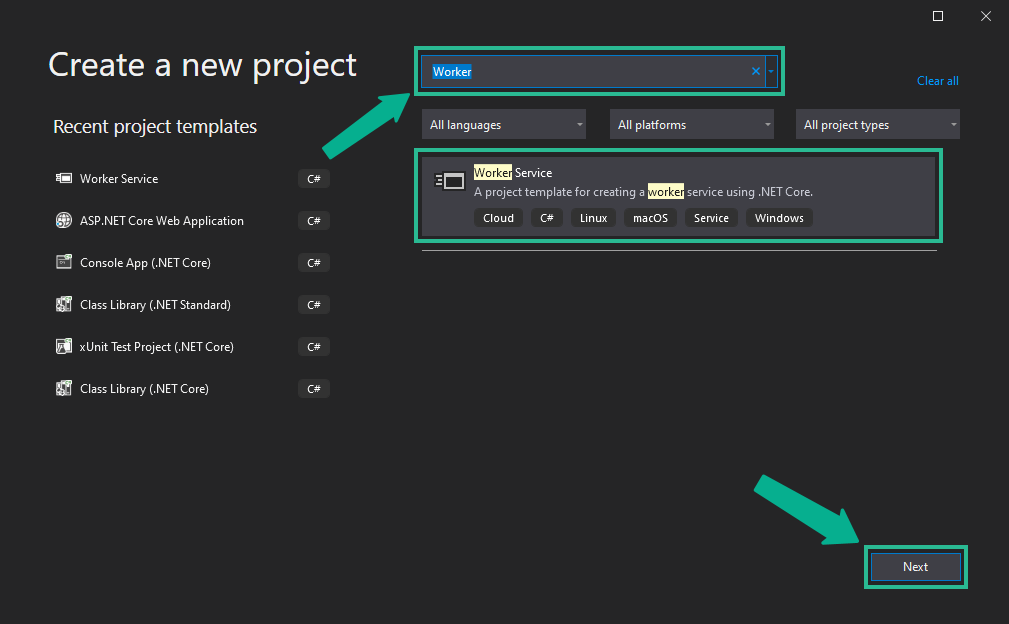
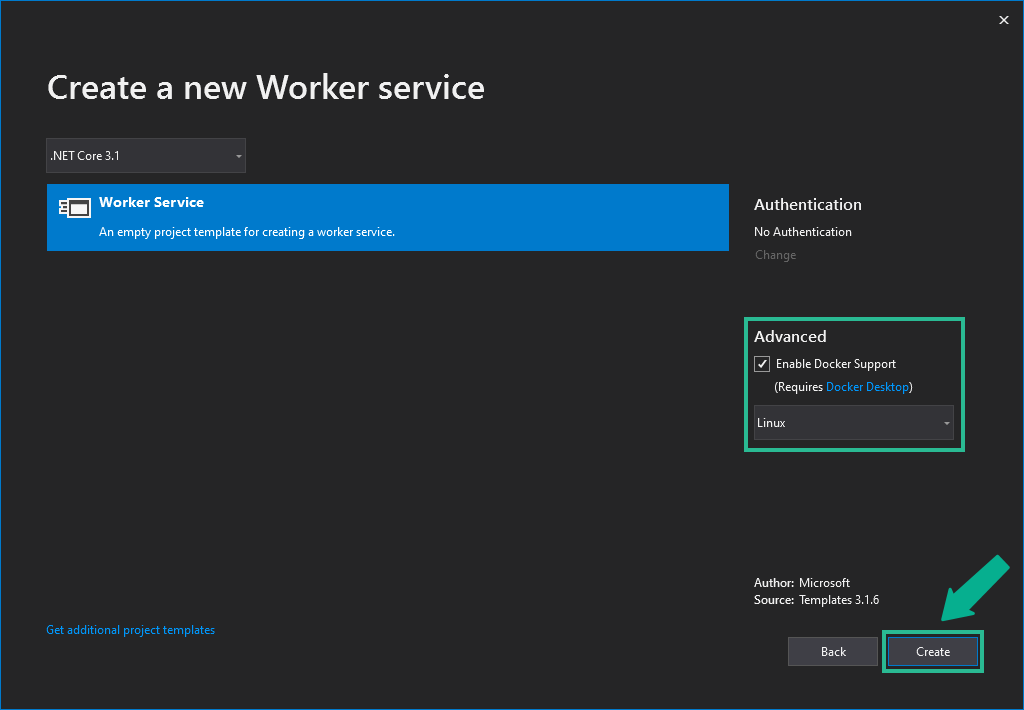
We can search for the worker service template from the “Create a new project” dialog inside Visual Studio.
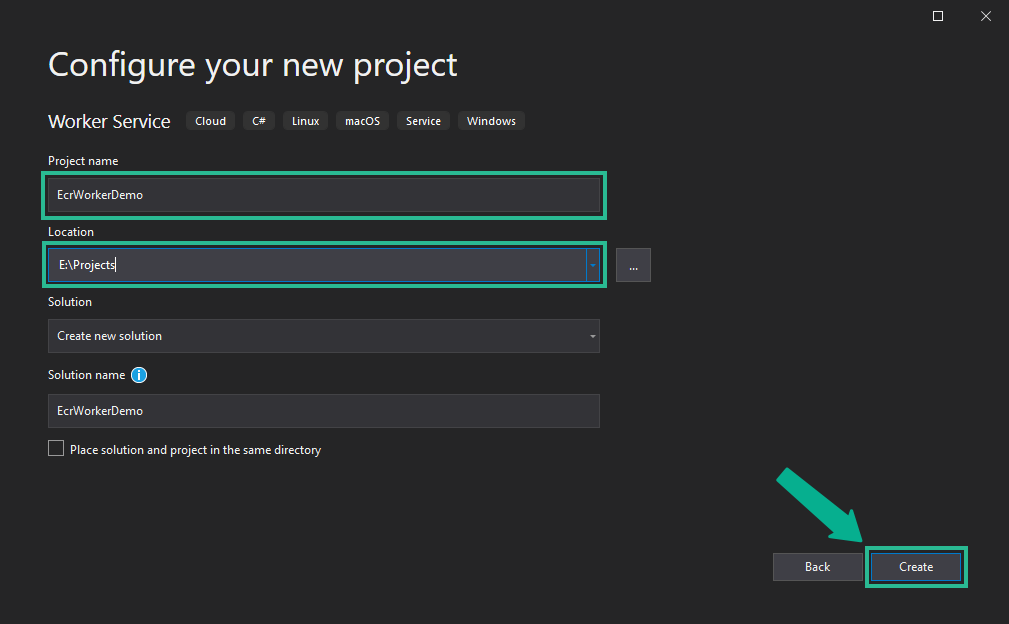
We can provide a name and location for the project.
For this example, we’ll ensure that we select the “Enable Docker Support” option for our new service.
This will create a Dockerfile and configure the project so that we can run it using a container. This step is necessary if you prefer to define your own Dockerfile for image creation.
One the project is created, we’ll leave it unchanged for this demo.
Building a Docker Image
Our next step is to build a Docker image for our application. The image can later be used to run one or more containers with our .NET worker service running inside.
Because we ticked the Enabled Docker Support option, a Dockerfile has been created for our application. A Dockerfile defines a sequence of steps, used to build up a final Docker image, capable of running our .NET application. Visual Studio places this file alongside the project.
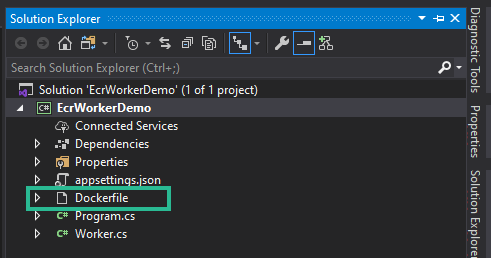
We won’t dive into the contents of this file or how it works for this post.
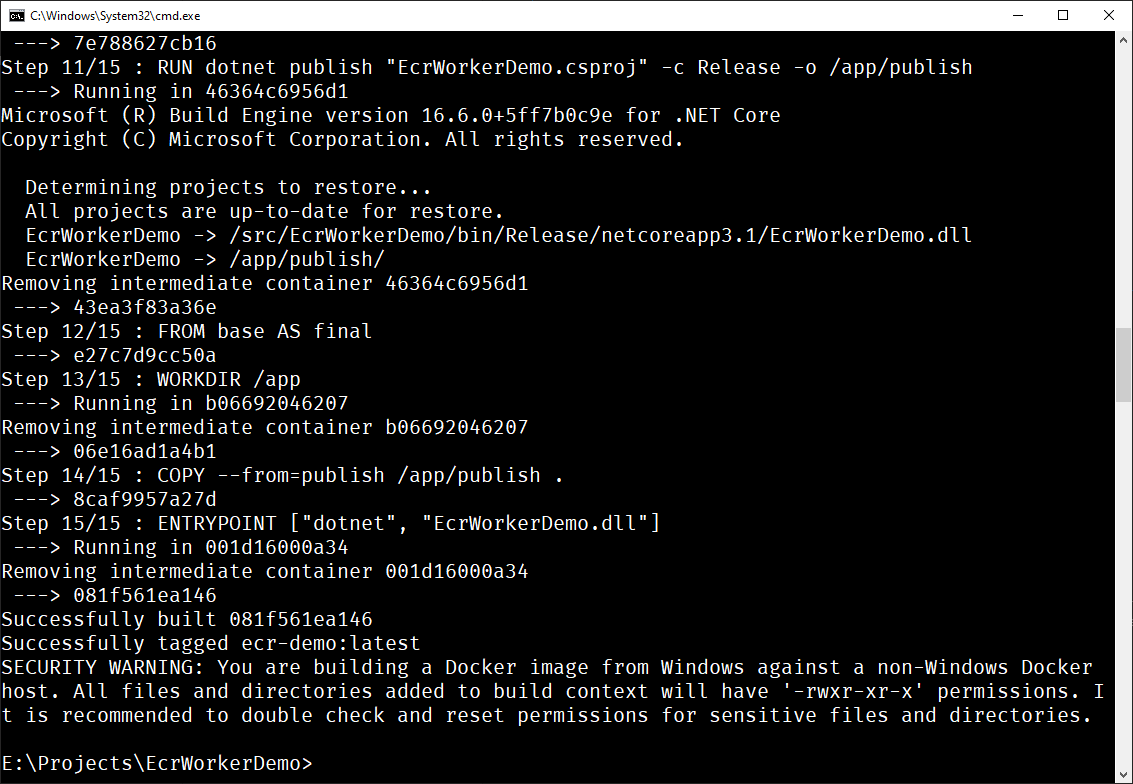
To build our Docker image using the Dockerfile, we need to ensure we execute our commands from the correct directory. Open up a command prompt and navigate to the directory containing your solution file. In my case, this is E:\Projects\EcrWorkerDemo.
To build an image, we can issue a Docker command. You’ll need Docker installed and working for this to execute.
docker build -t ecr-demo -f EcrWorkerDemo/Dockerfile .
The above command tags (-t) the image as “ecr-demo” and directs the build process to use the Dockerfile (-f) from our project directory.
After a few moments, you should see the output from this command begin running each step specified in the Dockerfile. At this point, we have a Docker image containing our .NET Worker Service.
Pushing a .NET Image to Amazon ECR
The final step we will complete in this post is to push our newly created Docker image into our repository on Amazon ECR. This will require a series of commands to be run.
Back inside the AWS console, we can get some help with these commands by clicking on the View push commands button.

A window will open, providing details of the steps and relevant commands that we need to run.
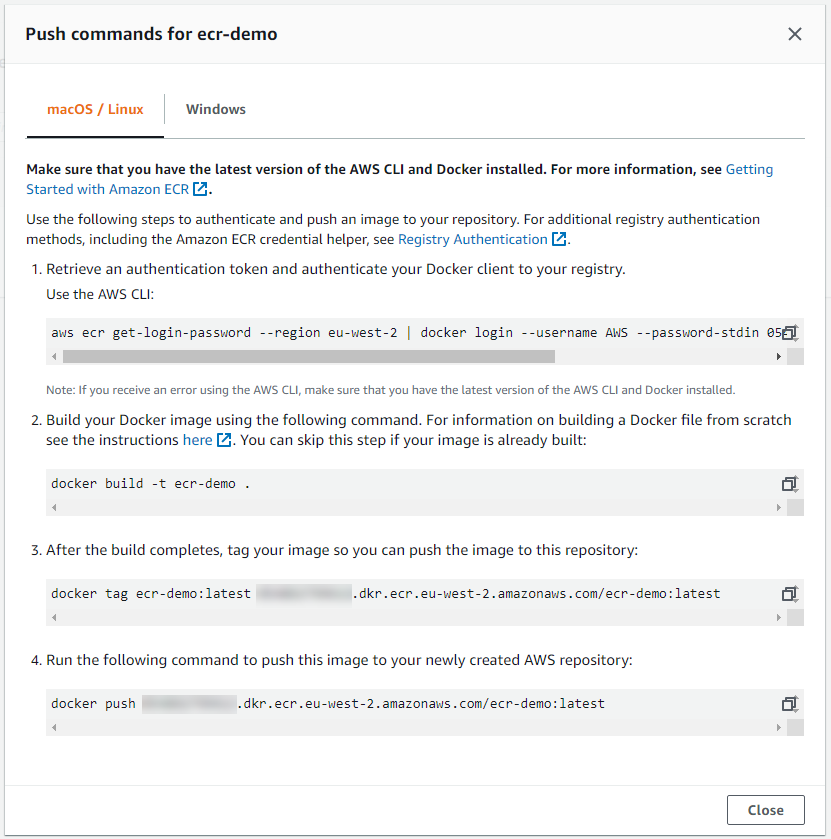
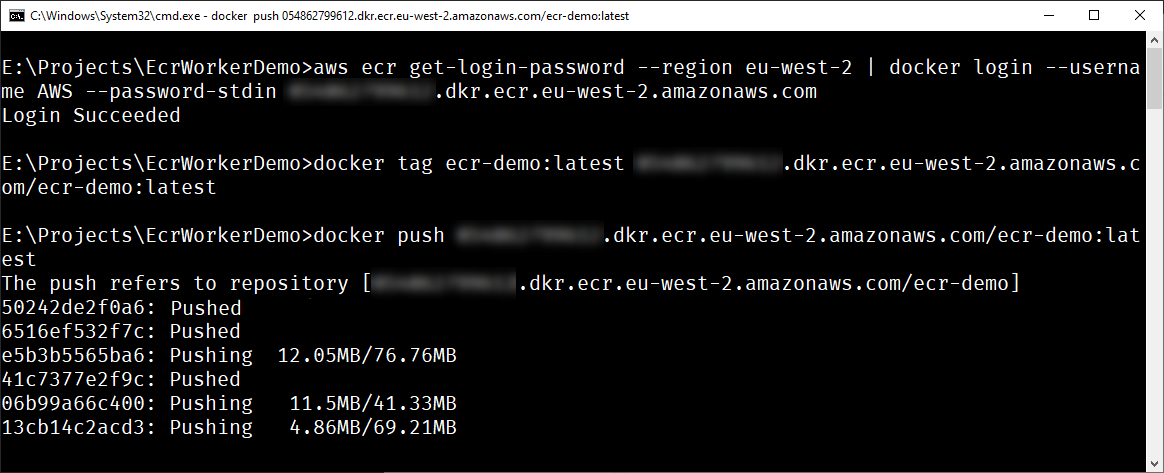
The first command is used to get an authentication token so that the Docker client can connect to our repository in AWS ECR. We want to ensure that only authorised users may push images. My local AWS credentials include full permissions to create and manage AWS ECR.
The second command we can ignore as we have already created our image.
Before pushing an image to a repository, you must tag it with the URL of the repository. This is what the third command achieves. By default, our Docker image was tagged as “ecr-demo:latest” and this command adds a tag with the URL to our repository.
The final command pushes the docker image up to AWS ECR. Because we authenticated the client, it should have permission to complete this step.
Pushing images may take a little while, depending on your network connection.
After all layers are pushed successfully, we can check to see that our new image has been pushed to the repository.
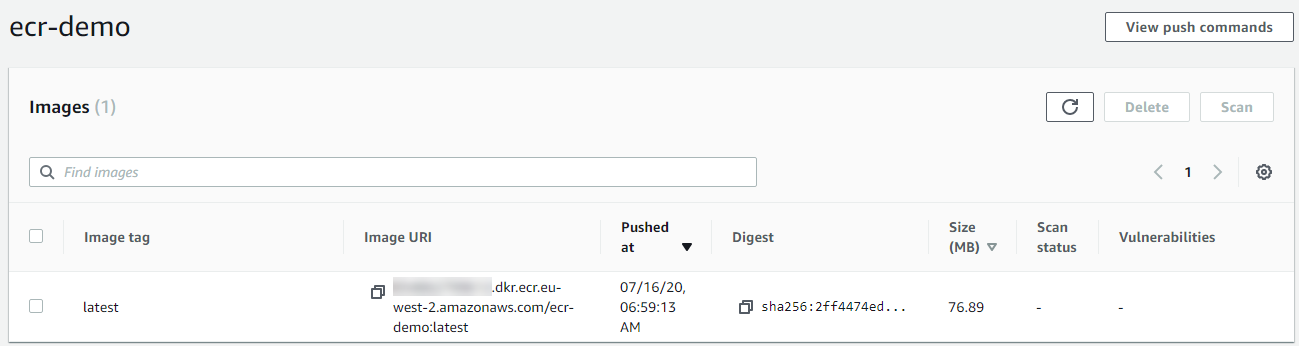
That’s where we’ll leave things for this post. I plan to continue this series with details about how we can run our images using AWS services such as Amazon Elastic Container Service.
Summary
In this post, we learned about some important foundation concepts for running .NET services using containers in AWS.
- We prepared some AWS ECR repositories through the console, the AWS CLI and CloudFormation.
- We created a new .NET Worker Service project with Docker support.
- We built a Docker image using a Dockerfile included alongside our project.
- We pushed the Docker image into an AWS ECR repository using Docker commands.
Have you enjoyed this post and found it useful? If so, please consider supporting me: